Your first meeting
Once permissions are granted, Petal asks for your name and a color to identify you to others (“Pick your name and color”), then takes you to the main menu — this is where you create or join meetings.

The main menu. When one of your rooms is live, it’s promoted to the top with a Join now button.
Creating a meeting
Section titled “Creating a meeting”The main menu has a single field (“Enter meeting name or Petal invite”) and
a button that reads Create/Join while the field is empty. Type a meeting
name (for example, eng-sync) and the button reads Create. Submitting it
creates a room under that name and takes you in.
Rooms you create are saved to a list on your machine so you can return to them later without retyping anything.
The access code
Section titled “The access code”Every room also has a short access code — three groups of lowercase letters
(3, 4, and 3 letters), like abc-defg-hjk. This code is what actually lets
someone into the room; the room name is just a friendly label. The code
deliberately skips the letters i and l so it’s harder to misread.
Anyone with the access code can join the room, whether or not they know its name.
Sharing an invite
Section titled “Sharing an invite”In your room list, every room shows its access code as a small chip. Click the chip to copy the room’s invite link. The link carries the access code (and a friendly label, when the room has one), so no one has to type a code by hand: opening the link launches the Petal app straight into the room, and if Petal isn’t installed, the page offers a download and a join-from-the- browser option instead. Inside a meeting, the bar’s Invite button copies the same link.
You can also just share the access code itself (over chat, or out loud) — anyone who enters it in Petal’s meeting field joins the same room.
Joining a meeting
Section titled “Joining a meeting”To join a room someone else created, paste the invite link or type the access code into the same field on the main menu. Once Petal recognizes it as a valid code or invite, the button changes to Join. Submitting takes you into the meeting.
The meeting window
Section titled “The meeting window”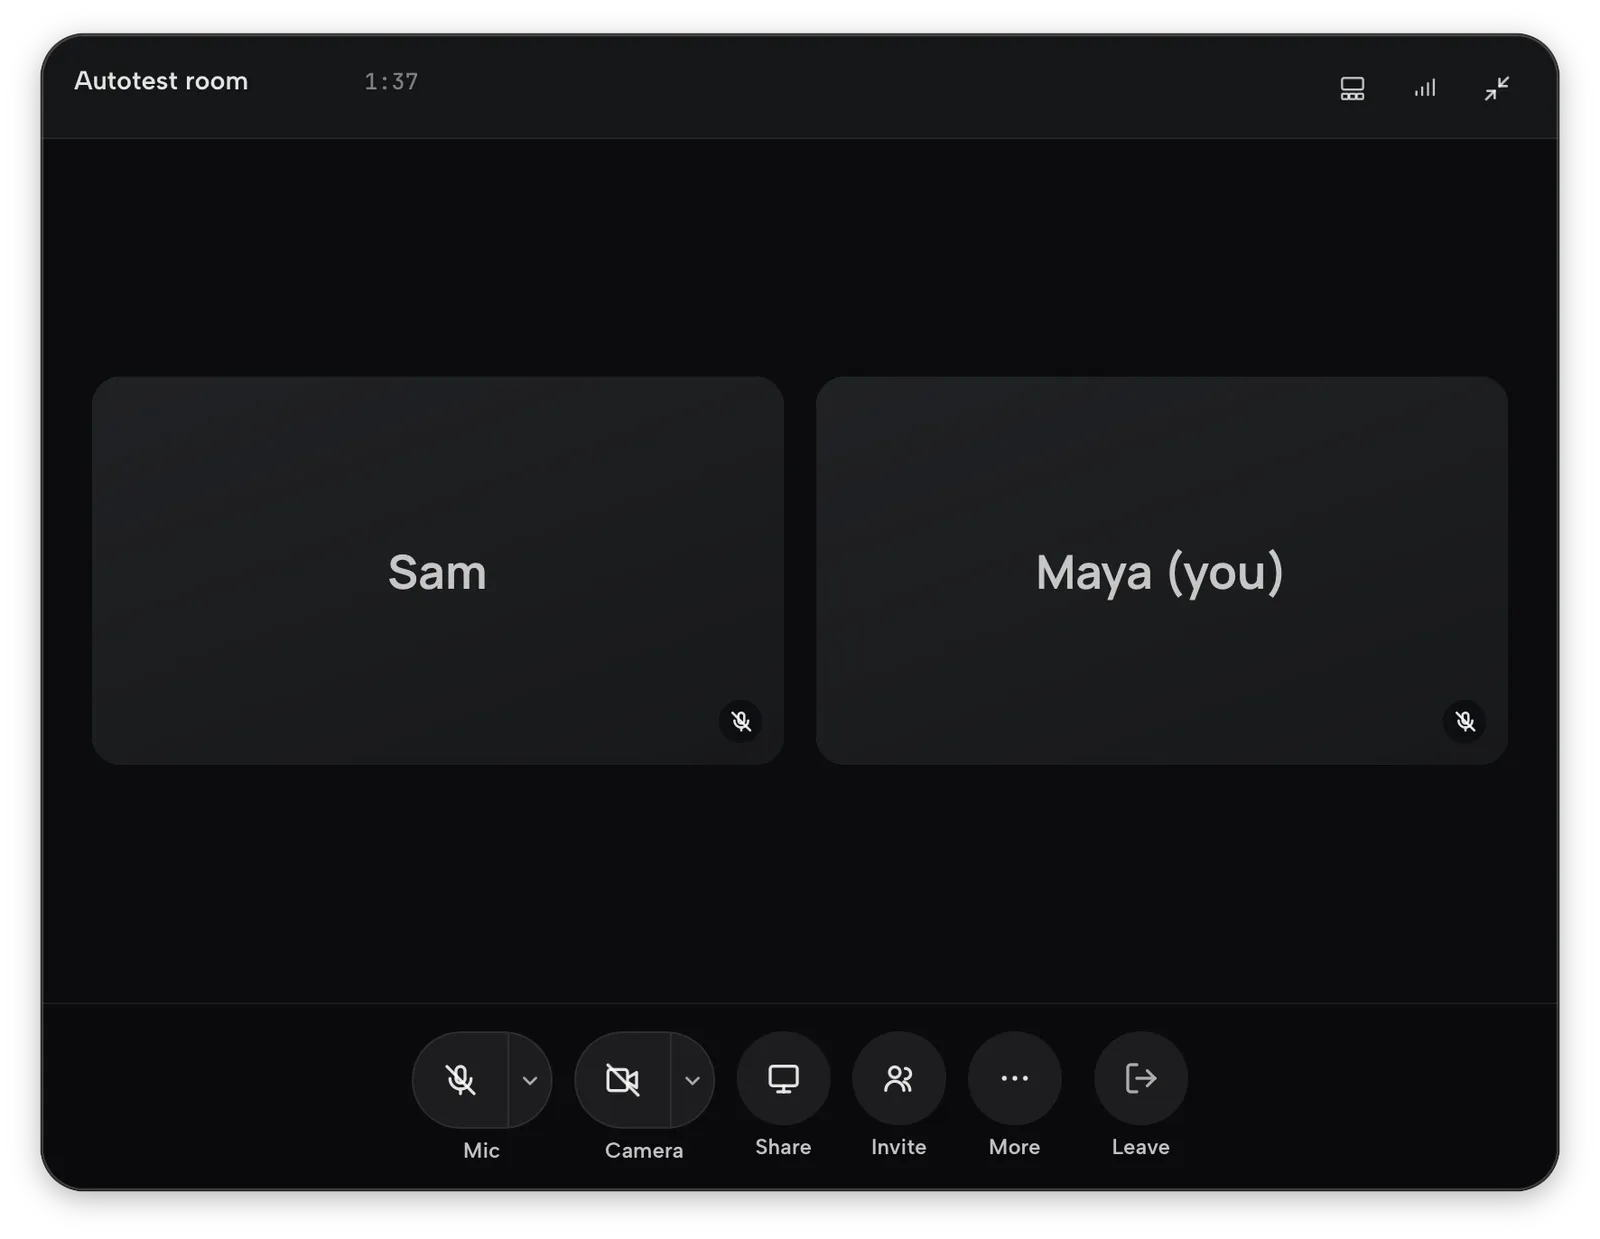
The meeting window shows the room name, a timer, and a tile for each participant (camera video when it’s on, the person’s name when it’s off). Along the bottom:
- Mic and Camera — toggle each; the small arrow beside them picks a device.
- Share — opens the window picker (see Sharing your windows).
- Invite — copies the invite link.
- More — Create Petal View (share a region of your screen) and Disable remote control / Allow remote control for this call.
- Leave.
The icons in the top-right switch between the gallery and a spotlight layout,
open the connection stats (Network Cockpit), and collapse the window to a
compact bar — a small floating pill with the same controls that stays out
of the way while you work. Expand it again from the pill. On macOS the global
shortcut ⌘⌃⇧P brings the pill back to the front from anywhere, and
⌘⌃⇧S toggles sharing of the window you last shared.
When a teammate starts sharing, a short notice appears at the top-center of your screen — “Name is sharing a window” — with a Bring to foreground action, in case the new window opened behind what you were doing.
The menu bar pill (macOS)
Section titled “The menu bar pill (macOS)”While you’re in a meeting, Petal’s menu bar item turns into a green pill showing your mic state and the participant count, with a one-click leave button. Click it for a popover with the roster, your recent rooms, the remote windows currently open on your desktop, and Settings.

What a teammate sees when they join
Section titled “What a teammate sees when they join”Once in the meeting, a teammate sees whatever windows you’ve chosen to share — each one rendered as its own native window on their desktop, not a tile in a shared grid. They can move each shared window independently, just like any other window on their machine. See Sharing your windows for how sharing works from the presenter’s side, and Viewing shared windows for what they can do with it.